

Undress a Giraffe in Photoshop
Undress a Giraffe in Photoshop
How to create a funny scene? even you are not a design expert, you can make one for yourself easily. You can use simple photo manipulation skills to take off the giraffe’s skin for ironing like the human.
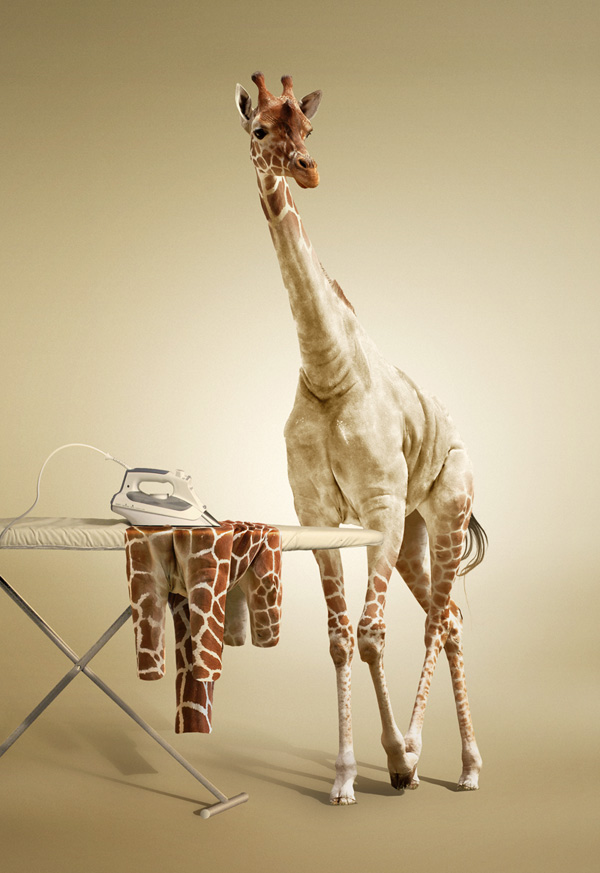
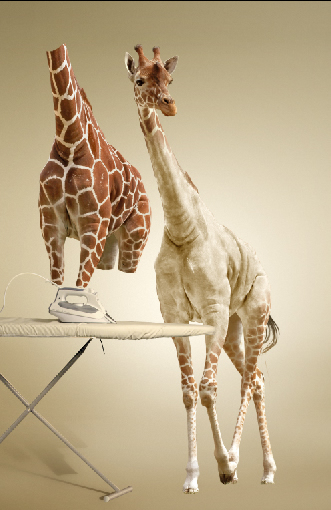
Final preview:
Tutorial Assets
The following assets were used during the production of this tutorial.
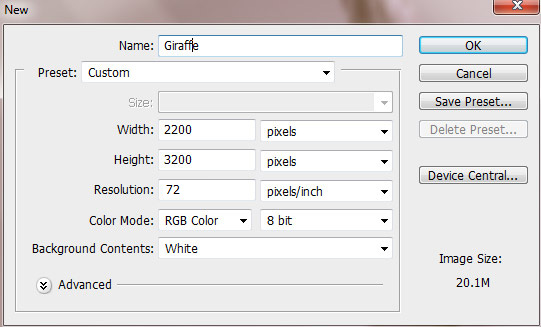
Step 1Let’s start by creating a new document in Adobe Photoshop. The size of document is 2200×3200 pixels at 72 px/inch of resolution. Start by filling the background with any color (white for example).
Step 2
First of all let’s create a simple and plain background. You may crate your own more interesting and multi-layered background – old style wallpapers or may be savanna landscape.
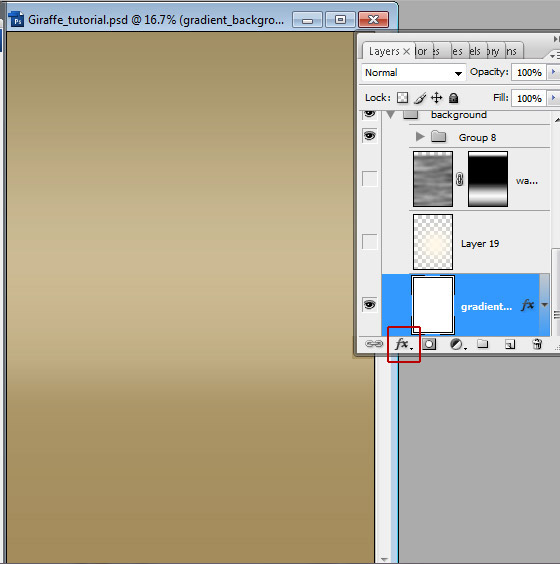
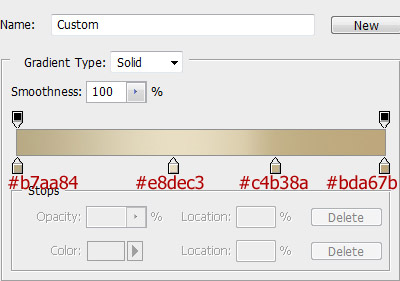
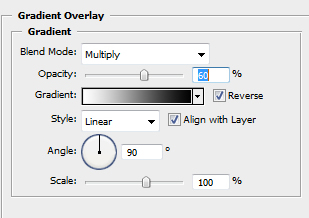
We will use gradients and filters. Unlock the "Background" – right click on background thumbnail and choose "Layer from background", click "Add a layer style" small icon![]() in the bottom part of the Layers Palette. Apply "Color Overlay" and "Gradient Overlay" styles. Use setting and colors just like on the screen shots below.
in the bottom part of the Layers Palette. Apply "Color Overlay" and "Gradient Overlay" styles. Use setting and colors just like on the screen shots below.


Step 3
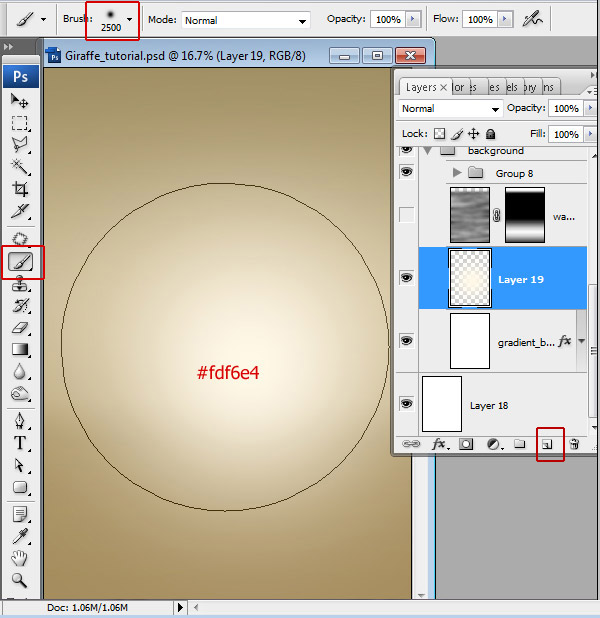
Create a new empty layer above background layer – click "Create a new layer" icon ![]() . Choose huge soft, light color Brush Tool and draw a spot in the central part of the document.
. Choose huge soft, light color Brush Tool and draw a spot in the central part of the document.
Step 4
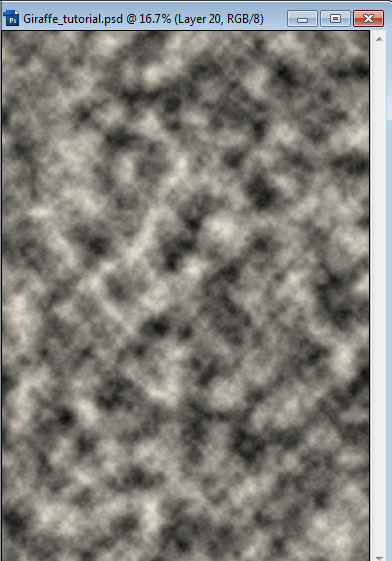
Create a new layer above light spot layer. Go to Menu > Filter > Render > Clouds.
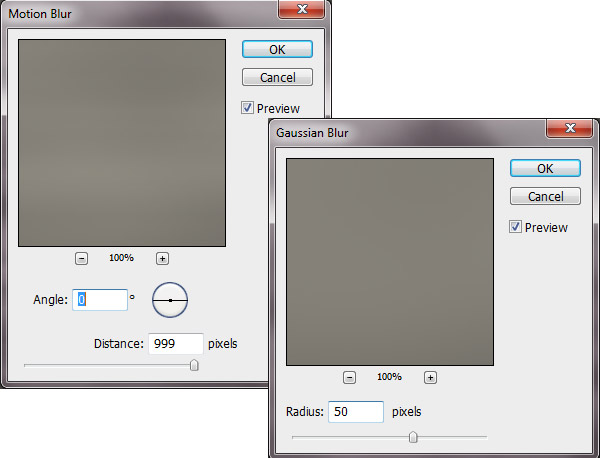
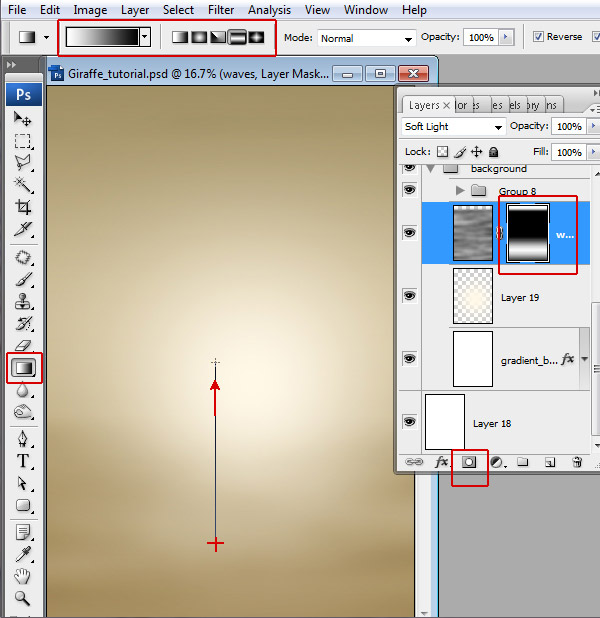
Choose Filters menu again and find Blur filter, apply Motion Blur and Gaussian Blur filters to clouds layer one by one. Add Layer Mask to blurred layer, click "Add Layer Mask" icon![]() . Make Layer Mask active and fill it with black and white Reflected Gradient in the bottom part of the document.
. Make Layer Mask active and fill it with black and white Reflected Gradient in the bottom part of the document.
Step 5
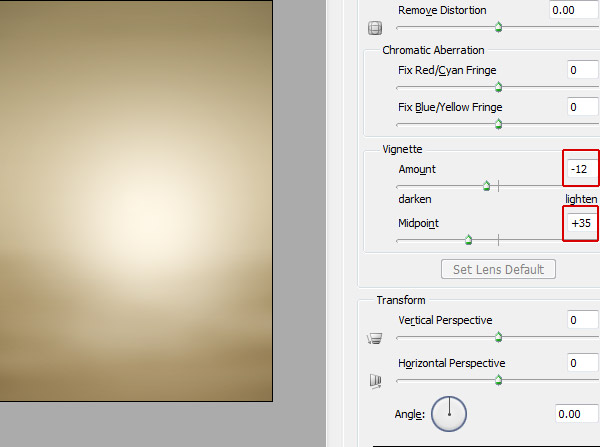
In order to create Vignette effect, choose Menu > Filter > Distort > Lens Correction > play with Vignette Amount & Midpoint settings.
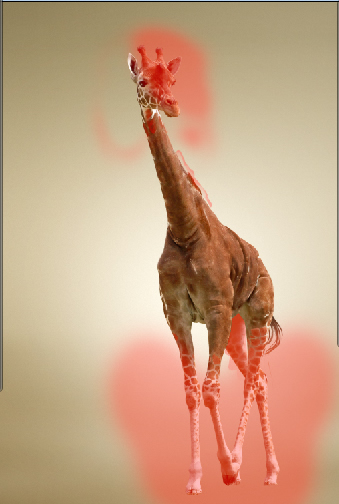
Step 6
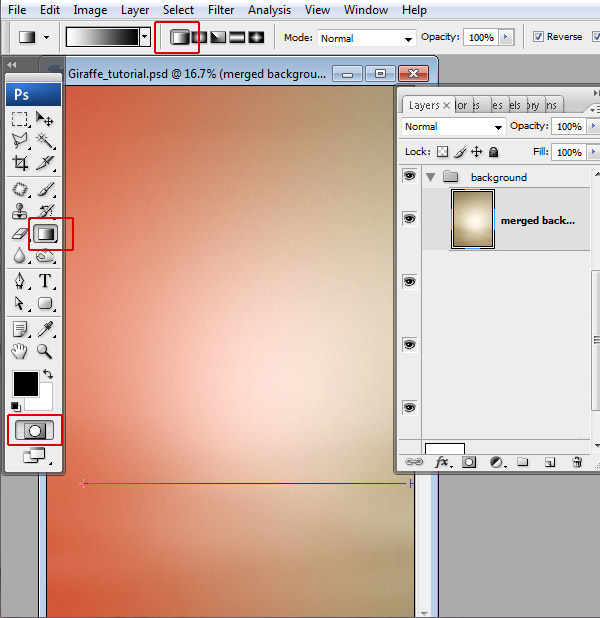
Merge all created layers. Make lighter the right part of our background, the light source will be directed from right. Make active Quick Mask Mode ![]() , choose Linear "black and white" Gradient Tool. Fill layer with gradient from left to right edge of the document. The left side should become pink. Make Quick Mask inactive (click
, choose Linear "black and white" Gradient Tool. Fill layer with gradient from left to right edge of the document. The left side should become pink. Make Quick Mask inactive (click![]() icon).
icon).
Step 7
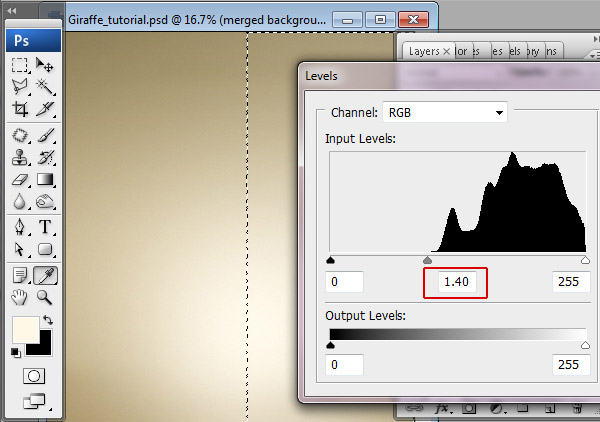
You will have selected area like on the screen shot. Play with Levels settings. Menu > Image > Adjustments Levels, move gray marker left. You can add small noise effect, to the created background layer. Go to Menu > Filter > Noise > Add Noise > 4; Uniform.
Step 8
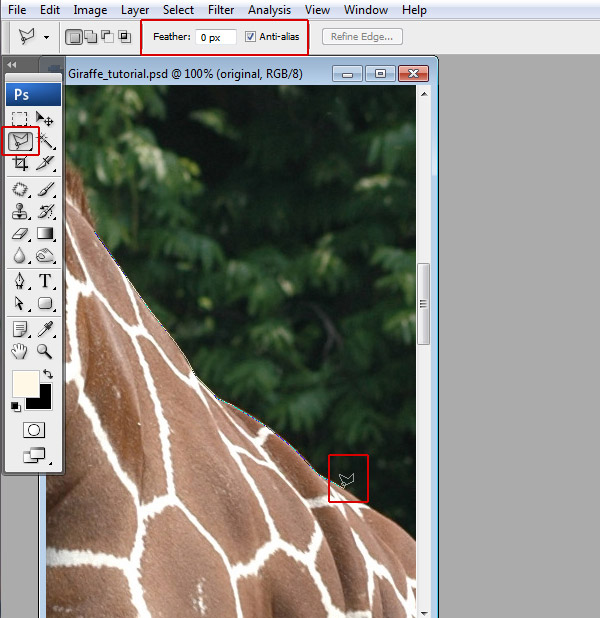
Insert giraffe image. Menu > File > Place – choose giraffe .jpg file. In order to separate giraffe silhouette from background, choose Polygonal Lasso Tool. You may use other methods, but this one is pretty easy and convenient. Click in the giraffe silhouette area to set the starting point. Continue clicking to set endpoints for subsequent segments. To close the selection border click over the starting point.
Step 9
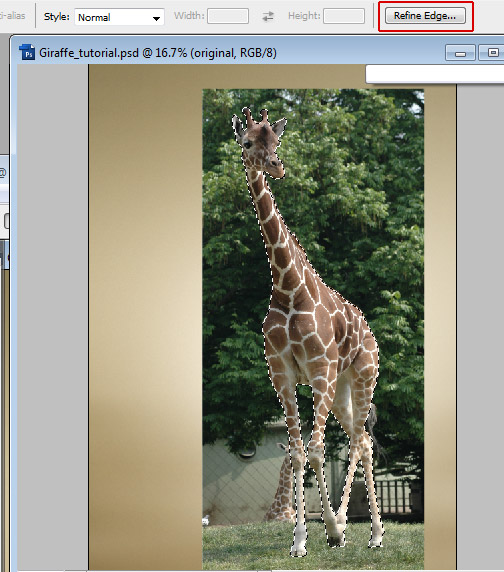
Click Refine Edge to improve the quality of a selection’s edges.
Step 10
Use following Refine Edge settings. Click "Ok" and inverse selection: Menu > Select > Inverse. Erase or clear selected background area (Menu > Edit > Clear).

Step 11
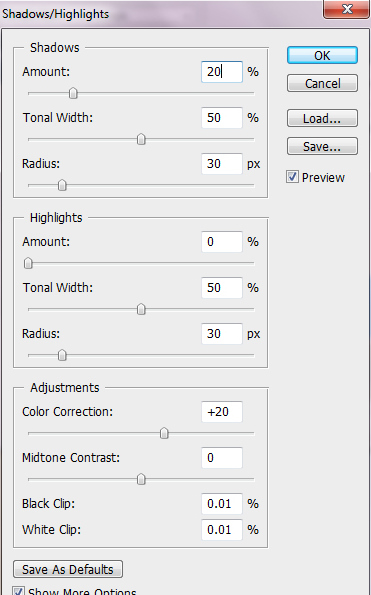
In order to retouch and improve color balance of the Giraffe image choose Shadows /Highlights from Image > Adjustments menu. Apply following settings:
Step 12
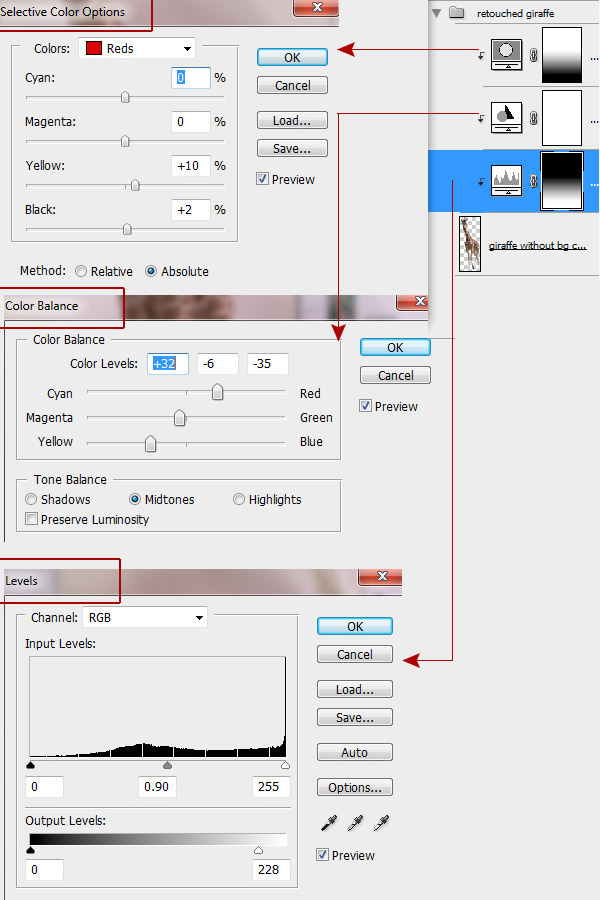
Add the new adjustments layers above Giraffe layer- "Levels", "Color Balance", "Selective Color Options", click ![]() icon in the bottom menu of the Layers Palette. Select all adjustments layers (make them active), right click > choose "Create Clipping Mask". Apply setting for each adjustment layer like on the examples below. Fill "Selective Color" and "Levels" Layers Masks with linear "black and white" gradient.
icon in the bottom menu of the Layers Palette. Select all adjustments layers (make them active), right click > choose "Create Clipping Mask". Apply setting for each adjustment layer like on the examples below. Fill "Selective Color" and "Levels" Layers Masks with linear "black and white" gradient.
Step 13
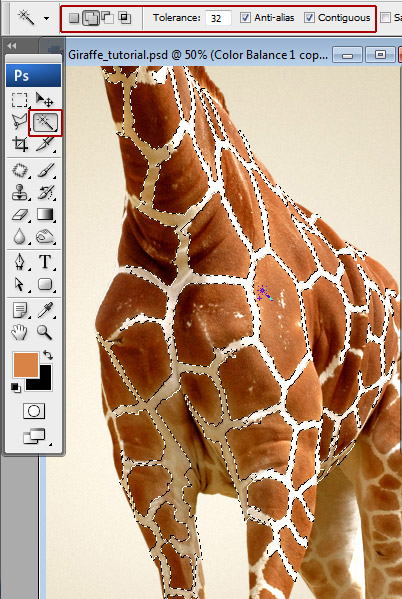
Load selection for white stripes with Magic Wand Tool. It is not necessary to load selection for all white spots at once, you may do this work by portions. Go to Menu > Select > Modify > Expand (expand by 1px).
Step 14
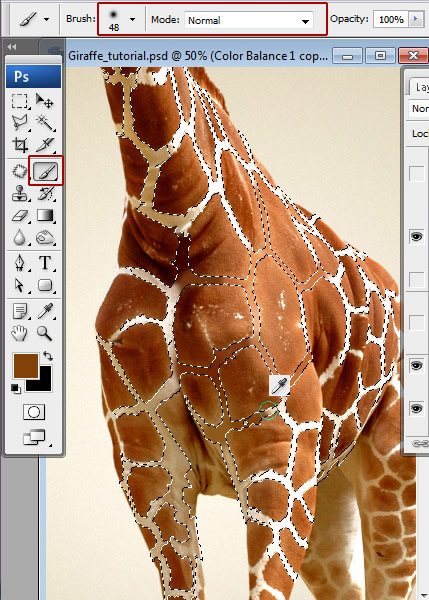
Duplicate the retouched Giraffe layer and fill selected stripes with brown color in the duplicated layer, name it "Clean skin layer". The original retouched Giraffe layer will be needed in the future steps, be sure that the original layer is below duplicate). Use 0% hardness brush and hold down the "Alt" key to activate Eyedropper Tool and find right color next to each stripe.
Step 15
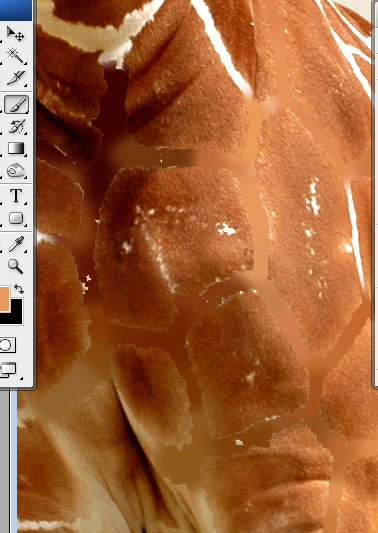
You should have something like this and you may fill out white areas with color step by step. Brown color stripes will be helpful to create more accurate result.
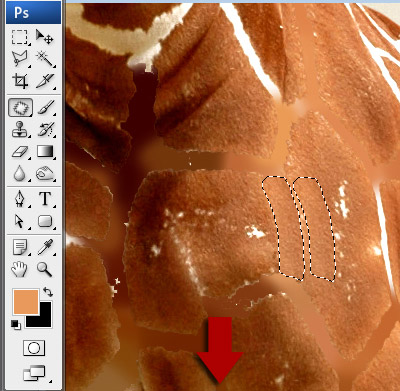
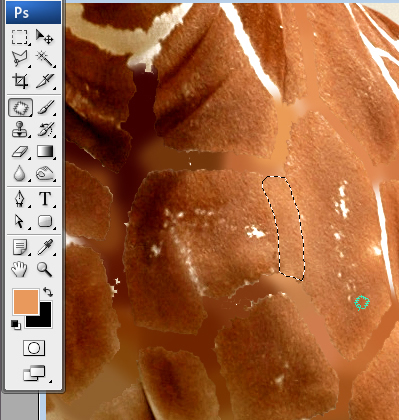
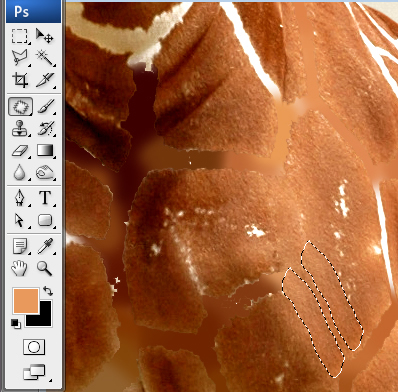
Step 16
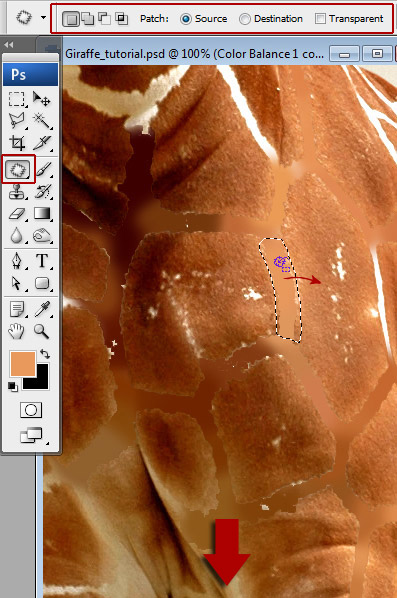
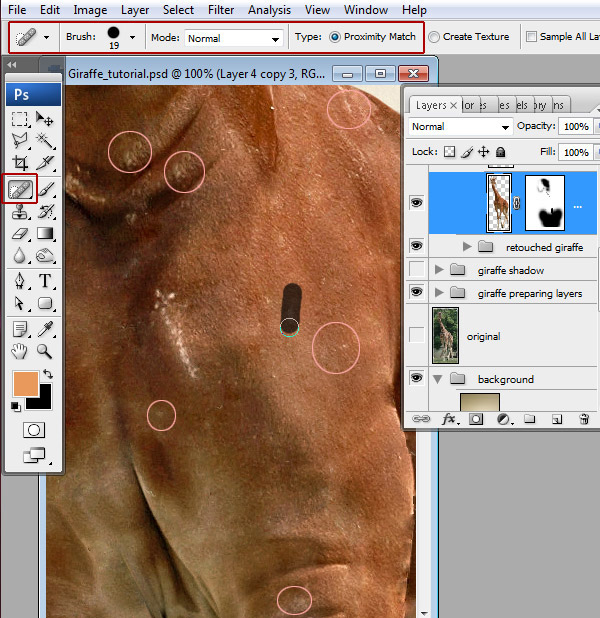
To remove stripes traces, use Patch Tool. Drag the selection border to the clean and textured skin area. When you release the mouse button, the trace of the selected area is patched with the sampled pixels. Repeat these actions to mask all stripe traces.
Step 17
You will have giraffe body without spots.

Step 18
Correct the "Clean skin" layer edges with smooth Eraser Tool to create blending effect between original (spotty) bottom layer and "Clean skin" layer.
Step 19
Mask the small defects with Patch Tool and Spot Healing Brush Tool. Choose a brush size in the options bar. A brush that is slightly larger than the area you want to fix works best so that you can cover the entire area with one click.
Step 20
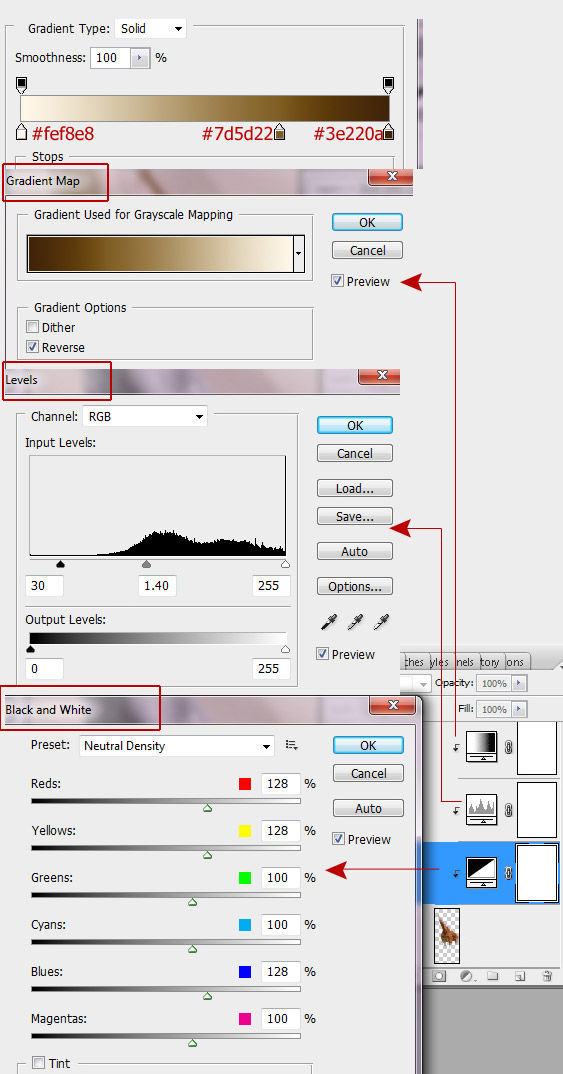
Now we can change skin color and levels balance. Add "Gradient Map", "Levels" and "Black and White" adjustment layers and create Clipping Mask for "Clean skin" layer. Apply following settings.
Step 21
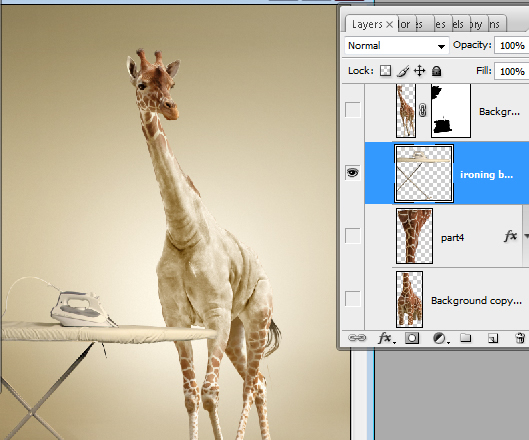
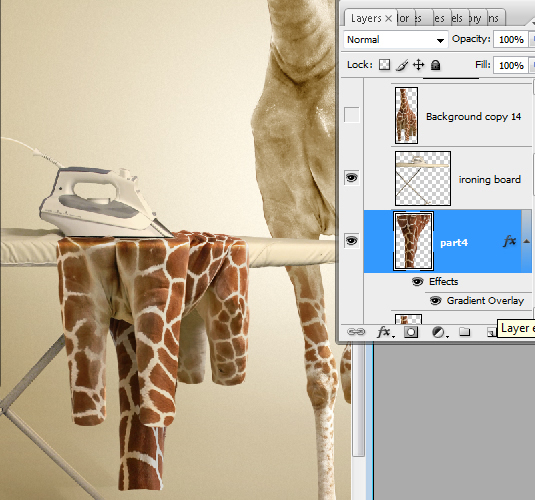
Insert Ironing Board image, it doesn’t require any changes and adjustments.
Step 22
Return to the retouched Giraffe layer and duplicate it once again. We will make Giraffe’s jacket using a new copy. Erase head and legs area.
Step 23
This is a shape for our future jacket.
Step 24
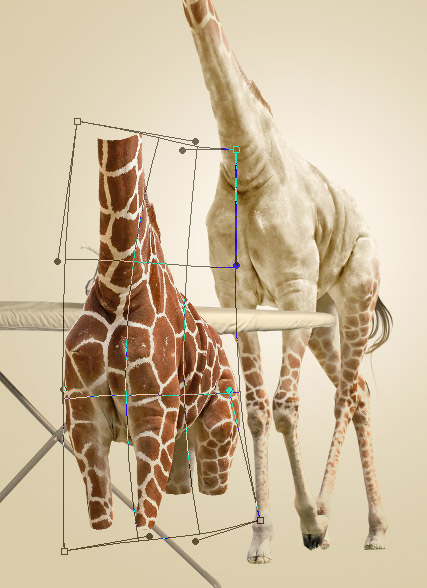
Correct the shape of the spotty jacket using Warp Transformation. Make a shape flatter. Go to Edit > Transform >Warp.
Step 25
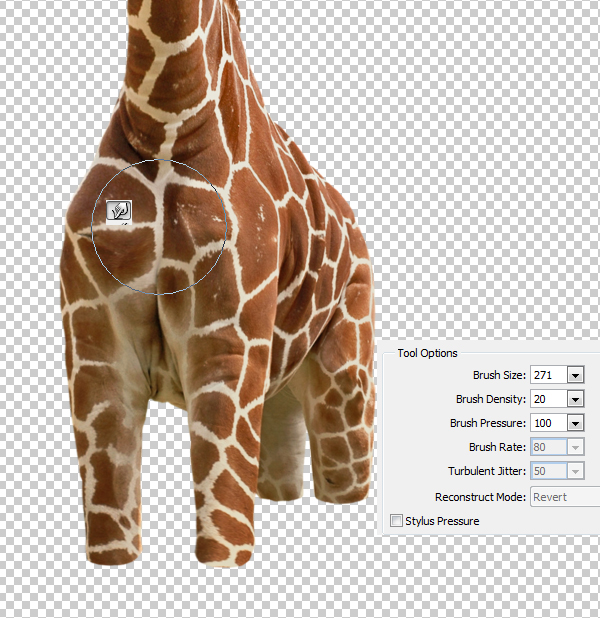
Liquify filter from Filters menu will help you to create flat shape effect. Use large Forward Warp Tool to correct large areas and smaller Warp Tool size to work with parts such as legs or skin wrinkles.

Step 26
Now we have flatter shape for the jacket.
Step 27
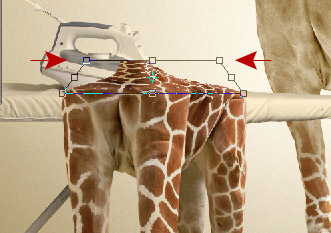
Apply Free transformation to jacket shape, make it smaller and little bit stretched by horizontal.
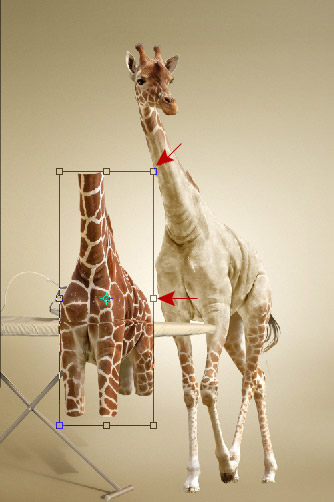
Step 28
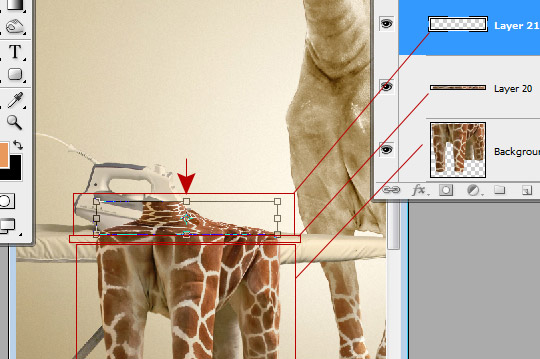
Select top part (above ironing board bottom edge) of the spotty jacket, cut out this part and paste it into a new layer. Stretch it by vertical using Free Transformation like on the example below.
Step 29
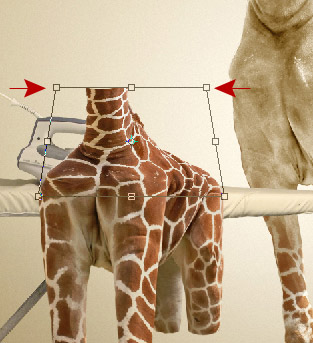
Apply Perspective Transformation to the top edge, Menu > Edit > Transform > Perspective.
Step 30
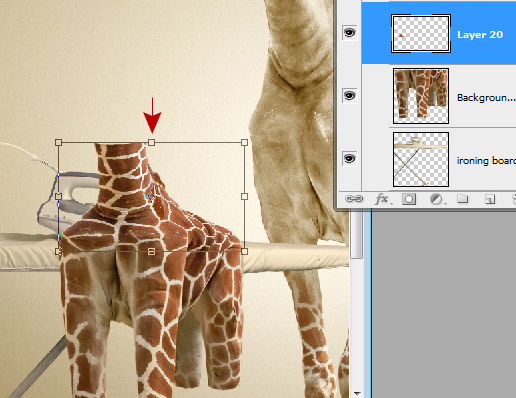
Keep active modified top part of jacket layer. Cut out top part again (above ironing board top edge), just leave stripe above trouser-legs ("Layer 20" on the screen shot below). Stretch top part by vertical again.
Step 31
Apply Perspective transformation.
Step 32
Make active top layer of the jacket layers. Erase iron and area above ironing board. Try to imitate skin wrinkles shape.


Step 33
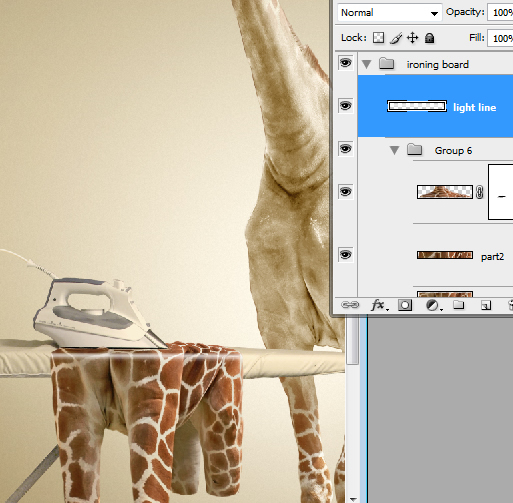
Draw white line with Line Tool in a new layer above giraffe jacket, use weight around 13 px and apply Gaussian Blur Filter (R=10px).
Step 34
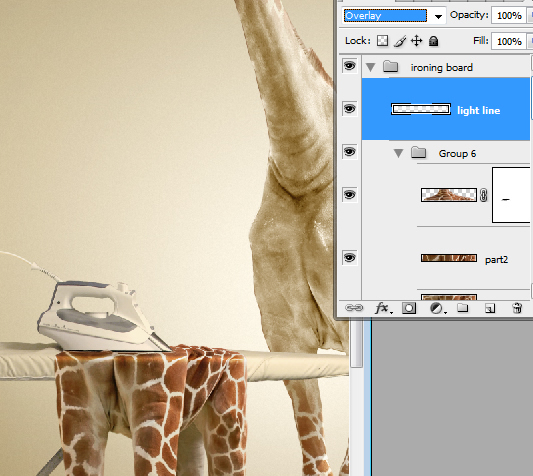
Change Blending Mode for this layer on "Overlay".
Step 35
Copy neck area from the original retouched Giraffe layer. Paste it into a new layer below ironing board layer. Apply flip Vertical transformation to this shape and Gradient Overlay layer style effect with settings like on the screen shot below.
Step 36
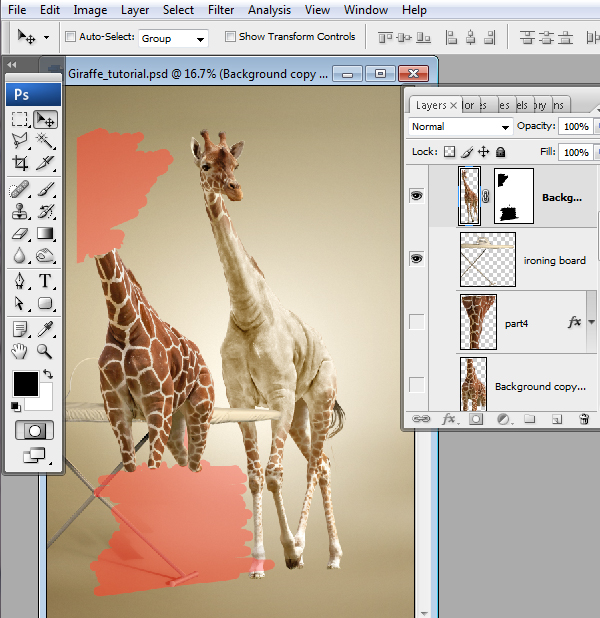
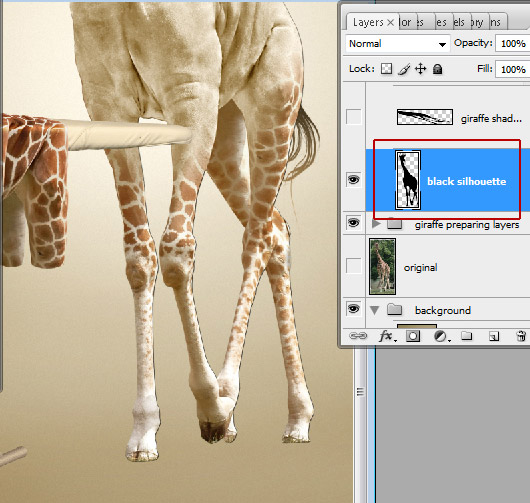
The final part of our work is creating the drop shadow effect for Giraffe and Ironing board. Load selection for Giraffe shape (Command/Ctrl + click Giraffe layer thumbnail). Create a new layer below of the all visible giraffe layers. Fill selection with any color.
Step 37
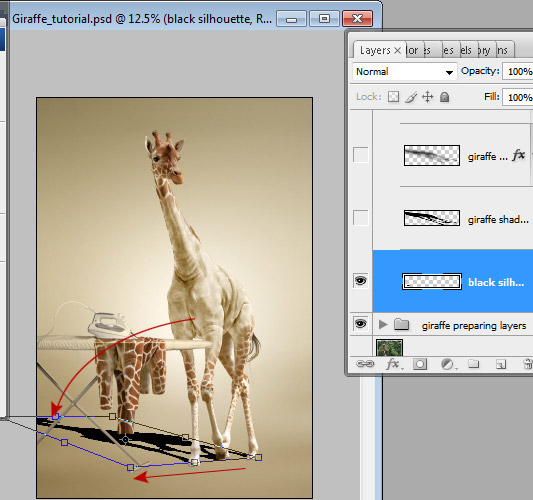
Apply Distort transformation to created shape. Edit > Transform > Distort. Move top edge and left bottom corner left and down. Try to combine drop shadow and legs in same points. Correct central legs shadow with Eraser Tool.
Step 38
This is result of our transformation.
Step 39
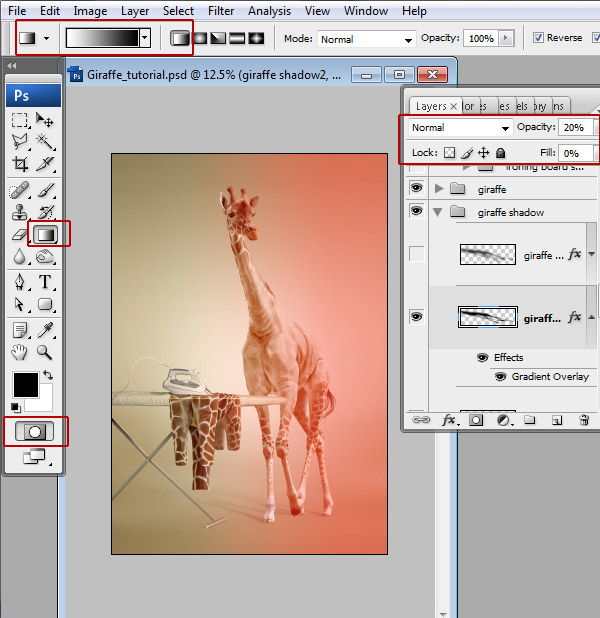
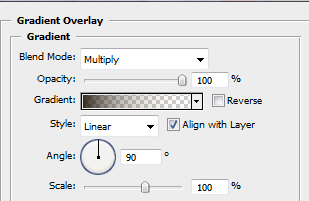
Set Fill parameter 0% and Opacity around 20% for the shadow layer. Apply Gradient Overlay layer style effect. Make active Quick mask Mode, fill layer with linear gradient like on the example below.
Step 40
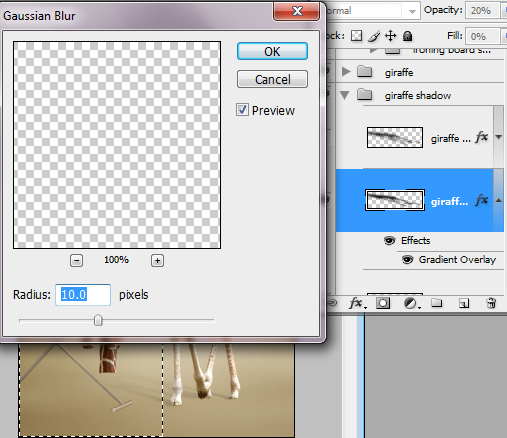
Click Quick Mask icon and apply Gaussian Blur to the selected area of the shadow layer.
Step 41
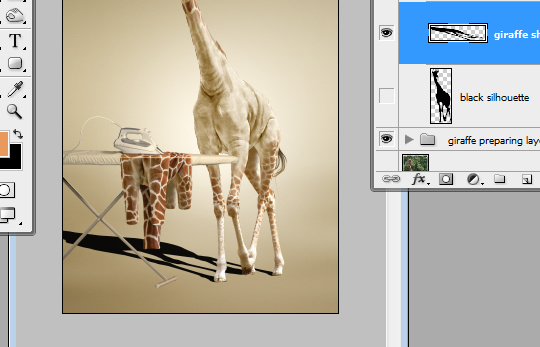
Duplicate shadow layer and apply Gaussian Blur filter with radius = 50 px and change Opacity to 70-75%.

Step 42
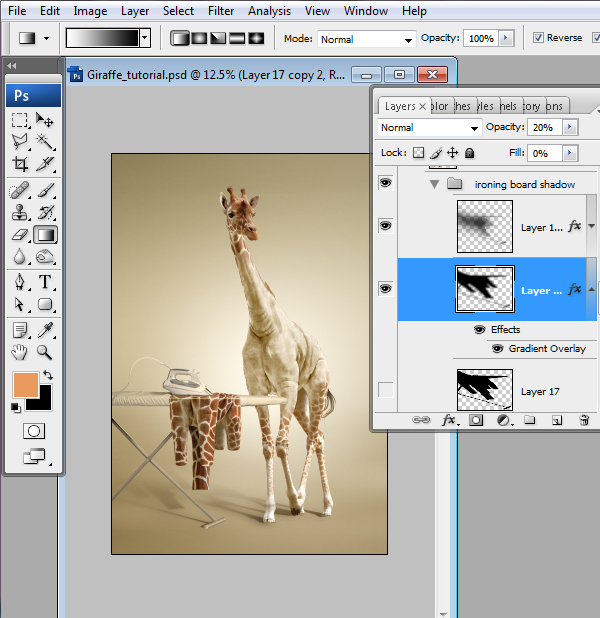
Create shadow effect for the ironing board using the same method. Load selection for ironing board and jacket, Apply Fill = 0%, Gradient Overlay effect with the same parameters. Apply Blurring 10 px and duplicate shadow layer with Opacity 75% and More Blurring.
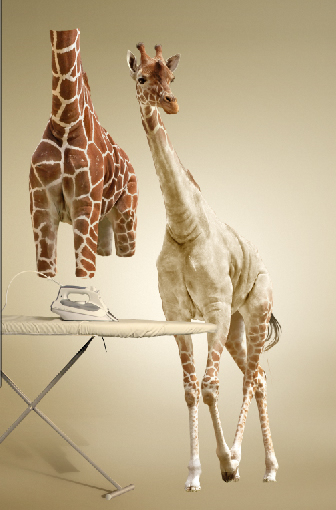
Final Image


